If you’re a new homeowner, congratulations! Owning a home is a great feeling, but it’s no secret that it comes with a lot of responsibility.
While we can’t help you figure out your property taxes or how to arrange your furniture, we can help you with some essential home repair advice and skills!
Our home renovation experts have 15 skills every homeowner should know. From repairing drywall to cutting off your main water valve, make mastering these skills a priority.
General Home Repair Skills & Maintenance Tips
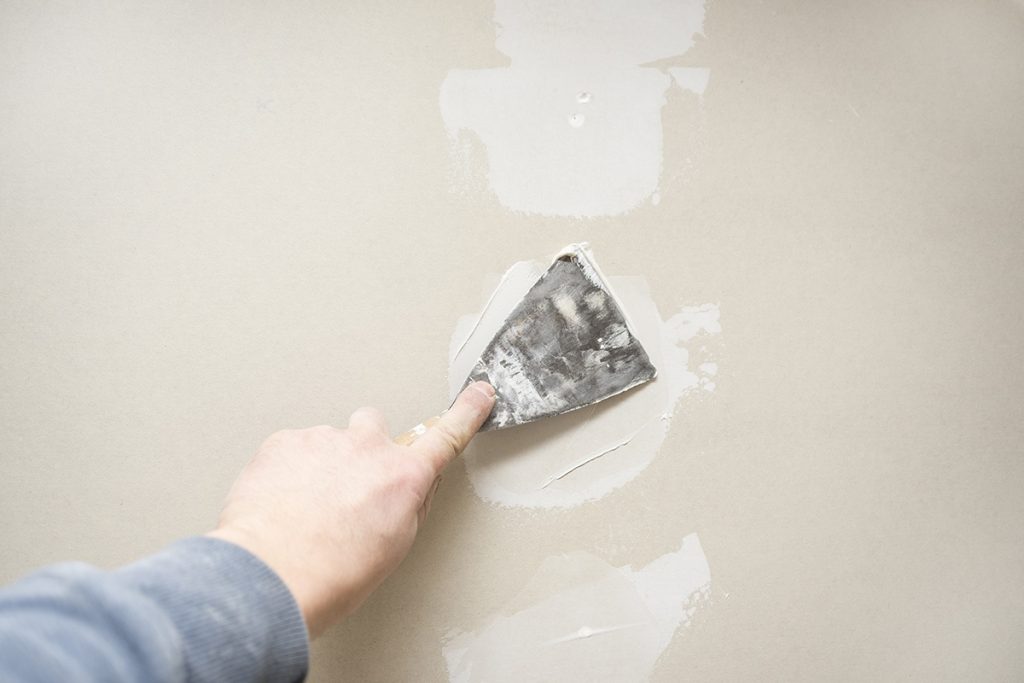
1. How to Repair Drywall
Drywall can be damaged in a variety of ways. Hanging pictures or shelves always leaves holes, rowdy kids or pets might scratch a wall, or furniture moving accidents can cause dents in your walls. Repairing damaged drywall is a relatively easy project that makes a huge difference in your home’s appearance.
All you need is a utility knife, sandpaper, a putty knife, joint compound, and extra drywall. Using your utility knife, cut the damaged area out of the wall. Use the piece to trace an appropriately-sized piece of drywall from the extra. This is your drywall patch. Apply joint compound around the edges of the patch, slide it into place in the wall, and let it dry overnight. The next day, sand the excess joint compound so that it is flush with the wall. Sand it smooth, paint it, and you’re done!
2. How to Change HVAC Filters
If you have central air conditioning in your home, you’ll need to replace your air filter approximately every three months. Regularly changing your air filters ensures the air in your home is clean and allows your HVAC system to run more efficiently. Knowing how to change the filter is a basic home maintenance skill.
To change your air filter, turn off your unit and remove the cover over the filter (some covers may be screwed in, so you’ll need to have a screwdriver handy). Discard the old filter. Using a microfiber cloth, wipe the vents clean. You can also use the hose attachment on your vacuum to clean the slats in the cover grille. Place the new filter in and close the cover.
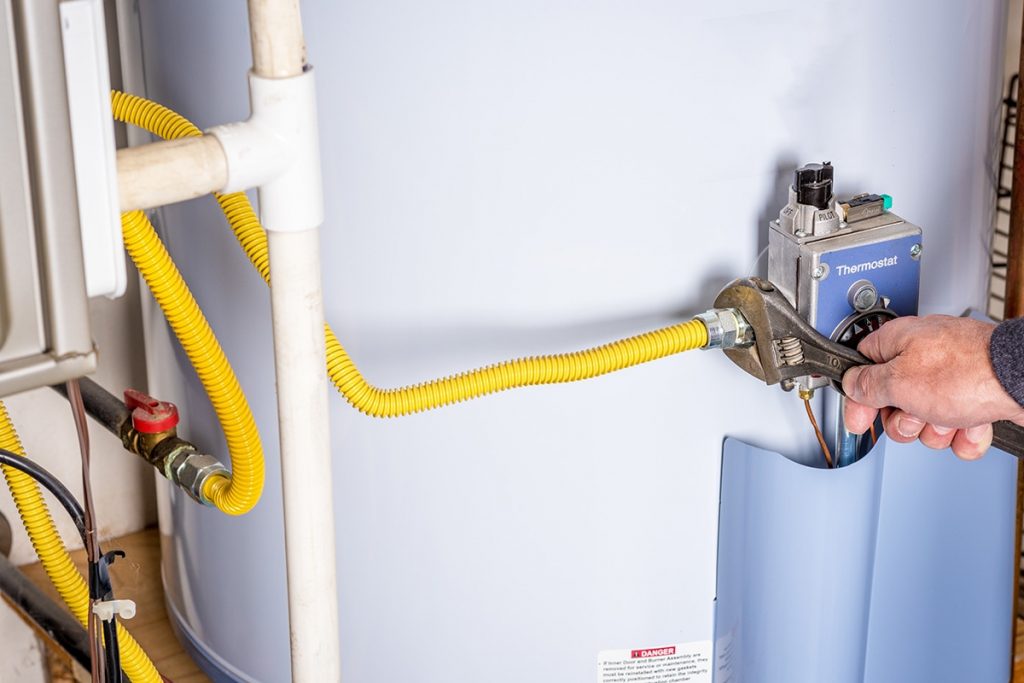
3. How to Turn Off the Gas
If your home has natural gas, it’s important to know how to turn off the gas. In the case of a gas leak, knowing how to turn it off is lifesaving. Familiarize yourself with your gas service shutoff valve, which is usually the first fitting on the supply pipe near your gas meter. You will need a wrench to turn the lever to shut it off, so it’s a good idea to keep one in an easily accessible place. Once you have turned your gas off, do not turn it back on yourself. Call your gas service provider to inspect your system and turn it back on.
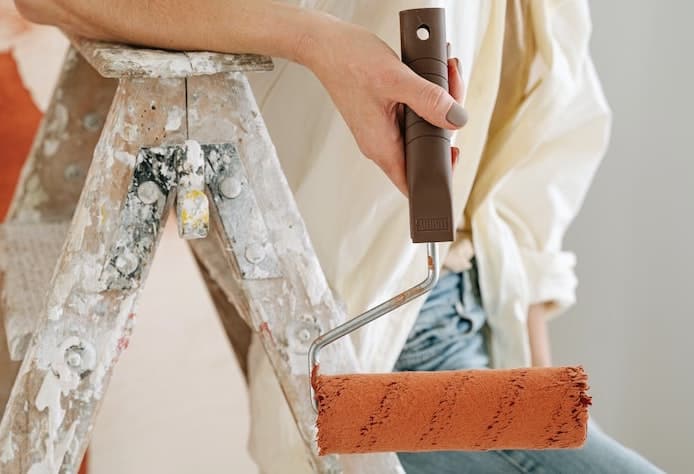
4. How to Do a Quality Paint Job
Painting is one of the most common home improvement projects, but a lot of people find it difficult to get satisfactory results from DIY paint jobs. Knowing how to do a perfect paint job is a home maintenance victory.
Here are our tips for a great paint job:
- Calculate the amount of paint you’ll need. There’s nothing worse than getting partway through a room and realizing you don’t have enough paint! On the other hand, no one likes having gallons of extra paint left over. The general rule is that you’ll use one gallon of paint per 400 square feet of surface painted. For a more accurate estimate, you can use a paint calculator.
- Prep the room. If possible, remove all furniture from the room completely. If that’s not possible, push the furniture to the center of the room and cover with a drop cloth or tarp. Cover your floor with another crop cloth and use painter’s tape to cover crown molding, baseboards, window and door trim, and outlet covers.
- Work in the right direction. When it’s time to start painting, you’ll want to use a roller and work from the top down. Use long strokes in a W pattern to get the best coverage and avoid roller marks. A paintbrush will help you get into corners. Wait until the first coat is completely dry before adding a second coat.
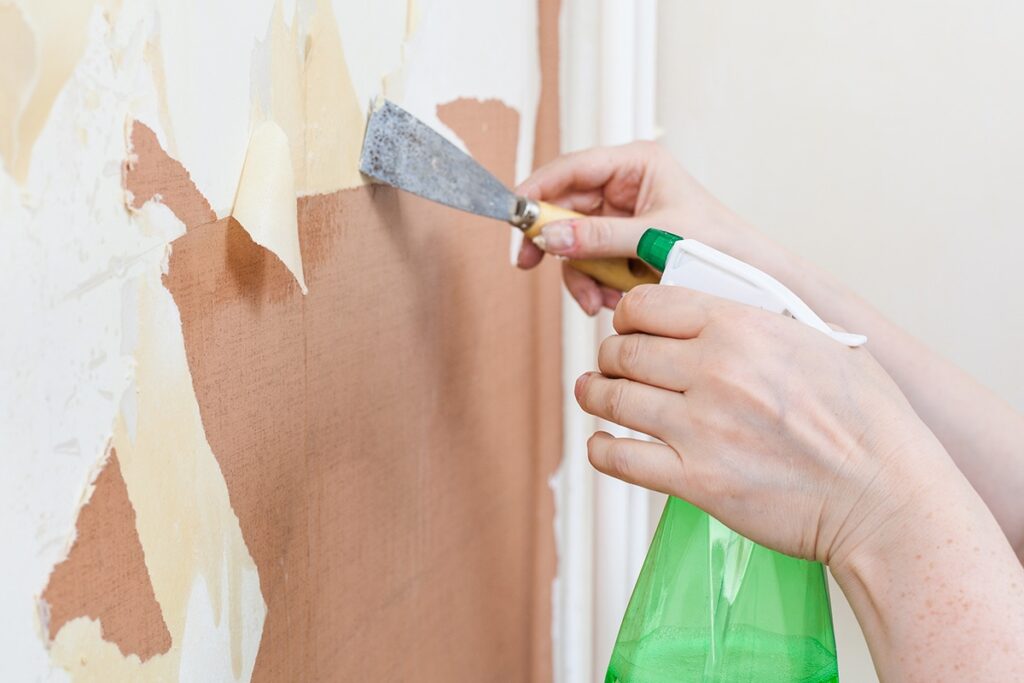
5. How to Remove Wallpaper
Whether you purchased a home with wallpaper that’s not quite your style or you hung wallpaper that is now unfortunately outdated, this is one home repair skill you’ll be glad you have! Removing wallpaper can seem daunting, but it’s not as difficult as you might think.
To remove wallpaper, purchase a scoring tool (available at most hardware stores). This will perforate the outermost layer of the wallpaper, allowing the following solution to soak in. Mix up a solution of ¼ parts liquid fabric softener to ¾ parts hot water. This mixture will reactivate the adhesive on the wallpaper, making it easier to pull off. Apply this solution with a sprayer, let it sit for 3-5 minutes, and scrape the wallpaper off with a putty knife. If you still have leftover adhesive on your wall once the paper is gone, simply repeat the process until everything is clean.
6. How to Fix a Leaky Sink
A leaky sink not only wastes water, it can lead to major damage. Knowing how to fix simple leaks is a basic home repair skill.
If the leak is under your sink, you probably just need to tighten the nut around the pipe. Simply use a wrench to tighten it a half turn at a time. If it’s still leaking, inspect the components to make sure there are no cracks and no metal threads are stripped. If you find cracks or stripped parts, replace them and your sink should no longer be leaky.
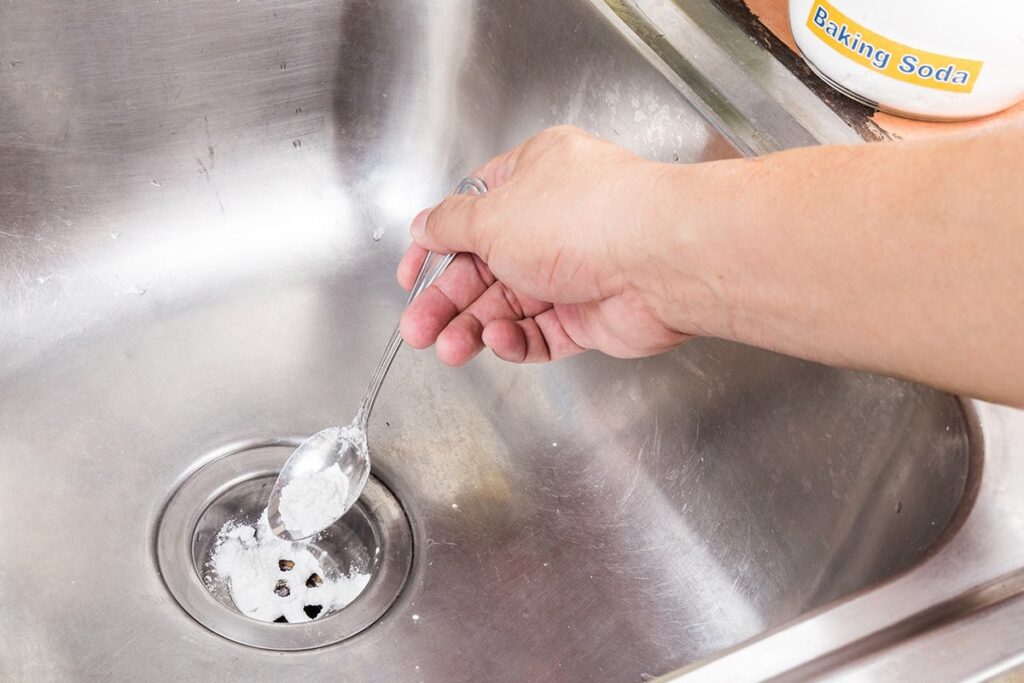
7. How to Unclog Drains
Every drain gets clogged at some point so it’s important to know how to unclog it! Chemical drain cleaners can be effective, but if you want something more natural, you can mix up a drain cleaner yourself.
To do this, pour half a cup of baking soda down your drain, followed by half a cup of vinegar. Cover the drain with a stopper or plunger and allow the mixture to bubble for around 15 minutes. Carefully pour hot water down the drain. You may need to repeat the process once more to get rid of stubborn clogs.
If cleaners aren’t doing the job, you may need to use a tool like a plumber’s snake (also called an auger) to clear clogs.
8. How to Cut the Main Water Supply
Knowing how to turn off your home’s main water supply is one of those pieces of knowledge that you should know, but you hope you never have to use. In the event of a major leak or broken pipe, shutting off the water supply at the source is the best way to stop the flow of water.
The main water valve is in a different spot in most homes. If you have city water, the main water valve is likely in your garage, laundry room or basement. In warmer areas, it is probably outdoors near your spigot or near your water meter. Simply turn the knob and you’ll cut the water supply.
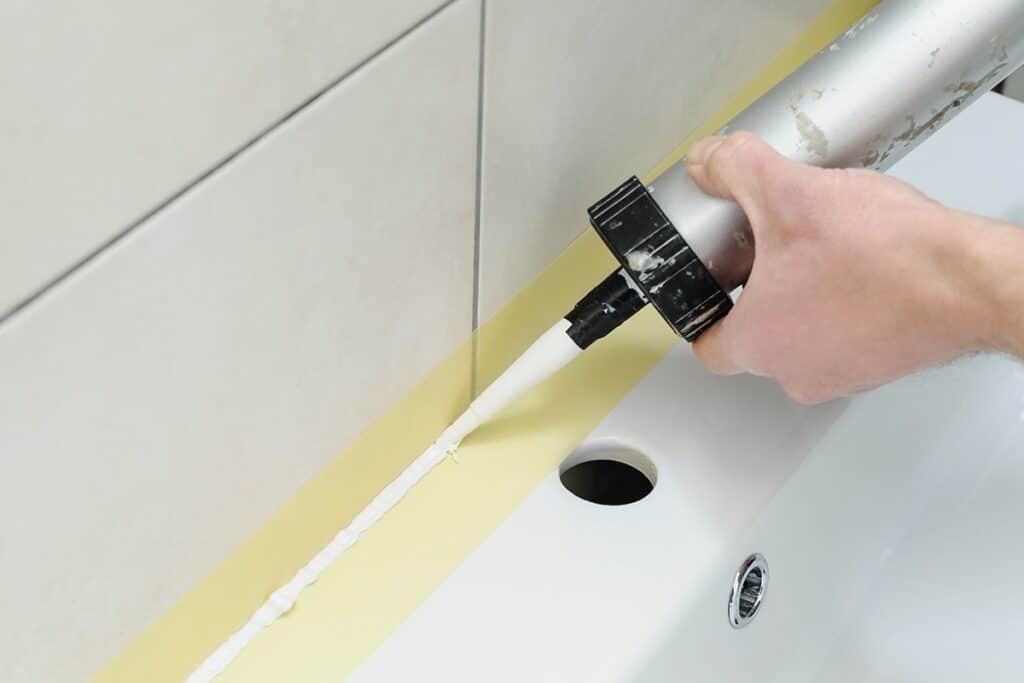
9. How to Caulk
This is a basic home repair skill that will come in handy time and time again, saving you money every time you do it yourself. When the caulking around your sink, tub, or even windows begins to degrade, it’s important to replace it to ensure that the seal remains intact.
With just a tube of caulk, a caulk gun, and a few basic tools, you’ll be able to fix it in no time. The basic process is: remove the old caulk, tape the area off, apply the new caulk, smooth it, and let it dry.
10. How to Replace a Showerhead
Upgrading your showerhead is a quick and easy way to improve your shower experience and refresh your bathroom’s style. Start by removing the old one, turning it counterclockwise with either your hands or pliers for a firmer grip. Then, clean up any rust, mineral deposits or other residue left behind on the shower arm threads before moving on to installation.
The next installation steps will depend on your new showerhead. Read the instructions included with your new product. Use thread-sealing tape to seal the threads and provide a good surface for your new showerhead. When installing, pay attention to how tightly you attach the new showerhead. Instinct may tell you to attach it as tightly as you can, but screw it on until it’s snug but not too tight. Any more may risk damaging the plastic connecting nut.
11. How to Prune Shrubs and Bushes
Most homes come with some landscaping, even if your yard is the size of a postage stamp. Caring for any shrubbery around your lawn will increase your curb appeal and keep your neighbors happy, too!
You should regularly monitor shrub growth, but you’ll likely only need to cut away dead branches and debris two times a year. Cut them with pruning shears before you address any trimming or shaping with live branches. We’d recommend doing this in late fall and early spring optimally, but maintenance can be performed whenever you have time or need.

12. How to Install Shelving
Looking for some more storage or display space? Floating shelves are a great solution, especially for smaller homes where floor space is precious. Attach them to wall studs for secure shelves you can store items on with confidence, or use wall anchors intended to hold the weight of your shelves and decor. Before you ever put a nail in your wall, use a level (or a level app on your phone) to ensure your shelf will be balanced well. An uneven, improperly installed shelf isn’t worth the headaches you’ll deal with later!
13. How to Change Your Ceiling Fan’s Direction
The direction your fan spins can help your HVAC system run smoothly, meaning it could net savings on your utility bill! This is reason enough to learn how to change your fan’s direction. For summer, change your fan to run counterclockwise, which creates a downdraft, pushing cool air down to you. For winter, fans should run clockwise, creating an updraft that encourages warm air to move downward.
Changing the direction is very simple. If your fan doesn’t have a remote or phone app that does this, you’ll just need a ladder. Turn the fan off and locate the switch that controls the fans’ spin direction. This will likely be on the motor enclosure of your fan. Once you’ve done that, turn the fan on to check the fans are now spinning in the other direction.

14. How to Hang a Picture
Pictures can infuse your space with color and personality. They’re one of the best decor choices you can invest in to make your house your own. Luckily, they’re very easy to hang up, requiring just a hammer, a nail or two and a pencil. Try to hang your picture around eye level (about 55 inches from the ground). If you’re going for a gallery wall, lay out the design so the pictures in the center are either at eye level or slightly above or below it. Lightly mark the spot where you nail or nails will go with your pencil.
Now that you’ve got an idea where your picture is going, it’s time to look into the specifics of hanging it. If it’s a light picture, a small nail will do the job nicely. Anything heavier will require more specific nails. For heavy pictures, you’ll need both a large nail and a wall anchor. If it’s heavier than 50 pounds (large artwork can get pretty heavy), a rail cable system may be the best choice. You may also consider using a stud finder to anchor your picture in a stud.

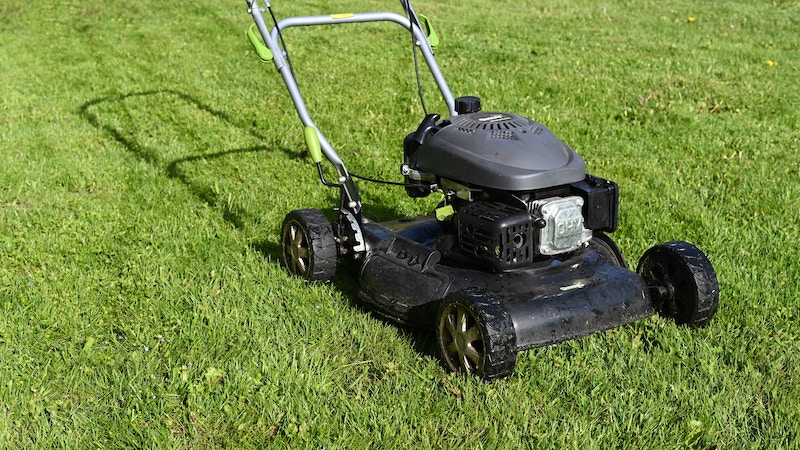
15. How to Mow the Lawn
If you’ve never had to maintain a yard before, lawn care is probably an intimidating aspect of homeownership. As long as you make a routine out of it, it’s easy to incorporate into your schedule. In fact, we’d recommend you make it part of your weekend morning chores. Wait for morning dew to dry and then mow. Afternoon mowing may not be as effective, since some of the grass will be wilting in the hot afternoon sun. Some of your blades may be uneven in the aftermath! Mowing in the morning makes sense.
Start by trimming up the edges of your lawn and around hard-to-mow places like your mailbox and planters. This will save you the headache of maneuvering the mower around those spaces and prevent potential damage. After that, your lawn mower can take care of the majority of your yard. Once you get into a routine, mowing once a week or every other week, make sure you don’t mow in the exact same pattern. By changing up the direction you mow your lawn, you’ll reduce turf wear, meaning your lawn will look better in the long run.
Make Home Improvement Simple With Window World of St. Louis
Two things that you shouldn’t have to do as a homeowner? Replace your own windows and doors. Leave that to the professionals at Window World. Our installers are trained to ensure your windows are installed properly the first time, every time. Learn more and get started by requesting your free estimate.